Repot Pepper Seedlings
[et_pb_section fb_built=”1″ _builder_version=”4.8.1″ _module_preset=”default”][et_pb_row _builder_version=”4.8.1″ _module_preset=”default”][et_pb_column type=”4_4″ _builder_version=”4.8.1″ _module_preset=”default”][et_pb_text admin_label=”Introduction – to do” _builder_version=”4.8.1″ _module_preset=”default”][/et_pb_text][et_pb_image admin_label=”opt in” _builder_version=”4.8.1″ _module_preset=”default”][/et_pb_image][/et_pb_column][/et_pb_row][et_pb_row column_structure=”1_3,2_3″ _builder_version=”4.8.1″ _module_preset=”default”][et_pb_column type=”1_3″ _builder_version=”4.8.1″ _module_preset=”default”][et_pb_image src=”https://www.urban-gardener.co.za/wp-content/uploads/2023/12/Repot-pepper-seedlings.png” alt=”Pinterest pin with repotted pepper seedlings” title_text=”Repot pepper seedlings” _builder_version=”4.8.1″ _module_preset=”default”][/et_pb_image][/et_pb_column][et_pb_column type=”2_3″ _builder_version=”4.8.1″ _module_preset=”default”][et_pb_text _builder_version=”4.8.1″ _module_preset=”default”]
Embarking on a gardening adventure can be a thrilling journey, especially when it comes to taking care of your pepper plants from their very beginnings.
Today, we’re diving into the world of repotting pepper seedlings—a crucial step in helping them grow strong and happy. Imagine your seedlings as tiny green superheroes, and we’re here to be their plant caretakers!
As we explore the ins and outs of repotting, we’ll chat about choosing the right soil mix with words like “potting soil” and “organic compost,” and we’ll discover how to move your little plant buddies to new homes using “transplanting techniques.”
So, get ready to be the hero of your garden as we learn the ropes of repotting pepper seedlings together!
[/et_pb_text][/et_pb_column][/et_pb_row][et_pb_row _builder_version=”4.8.1″ _module_preset=”default”][et_pb_column type=”4_4″ _builder_version=”4.8.1″ _module_preset=”default”][et_pb_text admin_label=”H2 – 1. pepper seedling preparation” _builder_version=”4.8.1″ _module_preset=”default”]
Pepper Seedling Preparation
[/et_pb_text][et_pb_text _builder_version=”4.8.1″ _module_preset=”default”]
Once your bell peppers reach between 2 – 4 inches, or even slightly larger, you are going to need to repot them. And then you can continue repotting your bell peppers every 2 – 4 weeks, depending how fast they grow.
These plants are quite tough and are quite easy to transplant without causing damage,
I have also found that starting seedlings as plugs, also makes the process a lot easier.
Add an Organic Fertilizer into the New Soil:
At this stage, your seedlings will benefit from a gentle introduction to fertilizer. When you report add a gentle, organic fertilizer into the soil of the larger pot. Using vermicompost is also a brilliant option if you have your own worm farms.
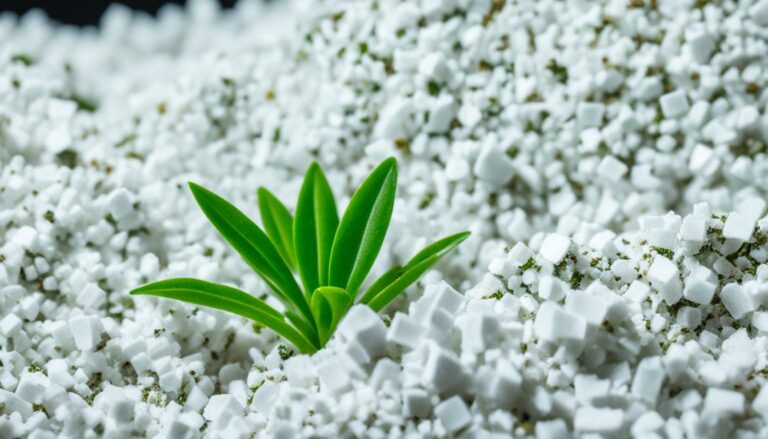
Encouraging Healthy Roots:
The development of a robust root system is crucial for transplant success. Transplant seedlings into larger containers to provide ample space for root expansion. This really does encourage the growth of a healthy and well-established root network.
Maintaining the Optimal Environment:
Continue monitoring environmental conditions. Keep the soil consistently moist but not waterlogged. Check that it’s not too hot in the sun, and if you see them wilting, move them into the shade and add water to the soil. If you need more humidity, look into a humidity dome or misting the plants regularly.
Protection from Pests and Diseases:
Keep a watchful eye for any signs of pests or diseases. It’s best to check your plants at least twice a day (morning and later afternoon), and hand pick any bugs that you can see. If you notice any signs of disease, try and ‘nip it in the bud’ immediately.
With your garden and feeding your family, always use natural remedies or organic insecticides to protect your seedlings.
Remember that you will ultimately be consuming this poison yourself when you eat the food.
[/et_pb_text][et_pb_text admin_label=”H2: Separating Bell Pepper Plugs” _builder_version=”4.8.1″ _module_preset=”default” min_height=”5px” custom_padding=”27px||3px|||”]
Separating Bell Pepper Plugs
[/et_pb_text][et_pb_text _builder_version=”4.8.1″ _module_preset=”default”]
You can either buy plugs from your local nursery or garden center, or you can grow them yourself. Just buy an inexpensive plug try and get growing!
What I have found to be great is that because the roots are constricted, they wrap together and are quite tough.
[/et_pb_text][et_pb_image src=”https://www.urban-gardener.co.za/wp-content/uploads/2023/12/Bell-peppers-seperating-plugs.jpg” alt=”Bell pepper seedlings from one single plug and showing how to separate them into individual plants for repotting.” title_text=”Bell-peppers-seperating-plugs” admin_label=”Bell peppers – separating plugs into individual seedlings” _builder_version=”4.8.1″ _module_preset=”default”][/et_pb_image][et_pb_text admin_label=”1. I found it easier to keep the soil dry to separate the roots because ideally you want one plant per pot.” _builder_version=”4.8.1″ _module_preset=”default”]
1. I found it easier to keep the soil dry to separate the roots because ideally you want one plant per pot.
[/et_pb_text][et_pb_text admin_label=”2. Gently work the roots apart until you have individual seedlings.” _builder_version=”4.8.1″ _module_preset=”default”]
2. Gently work the roots apart until you have individual seedlings.
[/et_pb_text][et_pb_text admin_label=”3. If you are struggling, just plant the entire plug” _builder_version=”4.8.1″ _module_preset=”default”]
3. If you are struggling, just plant the entire plug and using a sharp pair of garden scissors, snip the weakest seedlings off just above soil level.
[/et_pb_text][/et_pb_column][/et_pb_row][et_pb_row _builder_version=”4.8.1″ _module_preset=”default”][et_pb_column type=”4_4″ _builder_version=”4.8.1″ _module_preset=”default”][et_pb_text admin_label=”H2 – soil preparation” _builder_version=”4.8.1″ _module_preset=”default” hover_enabled=”0″ sticky_enabled=”0″]
2. Soil Preparation
[/et_pb_text][et_pb_text _builder_version=”4.8.1″ _module_preset=”default”]
Remember that if you get the soil right, your plants will be happy and thrive.
I’ve used a mix of 50% high-quality potting soil and river sand – the potting soil provides essential nutrients and aeration, while river sand helps with the water retention, preventing the soil from becoming overly compacted.
The addition of 50% organic compost enhances the mix by introducing a lot of organic matter, promoting microbial activity and ensuring a steady release of nutrients. You can either buy this organic compost, make your own, or use your own vermicompost (which is actually the best. compost you can get).
This combination potting soil and compost provides a stable structure for the roots and creates a fertile environment, encouraging healthy growth.
[/et_pb_text][et_pb_image admin_label=”Image – pH level for pepper plants is 6.0 – 6.8″ _builder_version=”4.8.1″ _module_preset=”default”][/et_pb_image][et_pb_text admin_label=”H2 – Transplanting seedlings into larger containers” _builder_version=”4.8.1″ _module_preset=”default”]
Transplanting Seedlings into Larger Containers
[/et_pb_text][et_pb_text _builder_version=”4.8.1″ _module_preset=”default”]
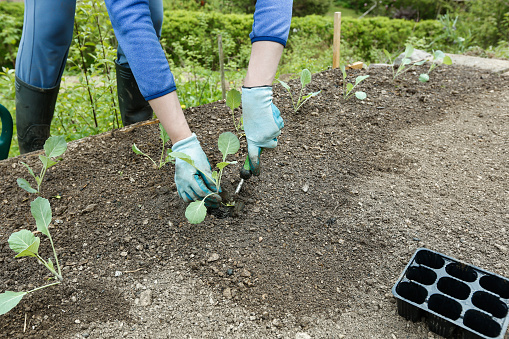
When it’s time for the transplantation of your pepper seedlings, choose a time of day when its a bit cooler so your seedlings don’t get too stressed. When you remove the seedling from its initial container, work gently, hold the stem in one hand, tilt the pot over and remove it that way.
If your seedlings are in seedling trays, or plug trays, just squeeze the bottom of the tray to get them out.
Have your pots with the potting soil ready. A while ago people said you had to put stones in the bottom of the container for drainage. I like to use a more ‘chunky’ compost instead. That’s just my preference as it is organic, it doesn’t waste space, and it is good for your plants.
[/et_pb_text][et_pb_text _builder_version=”4.8.1″ _module_preset=”default” min_height=”265.4px”]
Now, make a hole in the soil that is large enough for your seedling. Try and keep the seedlings at the same depth they were in the original containers.
Water the transplants generously, incorporating eco-friendly practices and organic fertilizers to kickstart their outdoor journey.
During this stage they need more nitrogen (N) to help the roots develop, grow, and strengthen.
Always use an organic source such as worm castings (vermicompost) which isn’t purely nitrogen but will also have small amounts of phosphorous and potassium in it which your plants will need as well.
You can also use blood meal, feather meal, and fish meal.
[/et_pb_text][et_pb_text admin_label=”Description of the 2 images” _builder_version=”4.8.1″ _module_preset=”default”]
In the images below, this young bell pepper plant needs repotting. The stem needs to be deeper and more covered, and the tops of the roots shouldn’t be exposed either.
[/et_pb_text][/et_pb_column][/et_pb_row][et_pb_row column_structure=”1_2,1_2″ _builder_version=”4.8.1″ _module_preset=”default”][et_pb_column type=”1_2″ _builder_version=”4.8.1″ _module_preset=”default”][et_pb_image src=”https://www.urban-gardener.co.za/wp-content/uploads/2023/12/Measuring-the-size-of-the-hole.jpg” alt=”Measuring the size of the hole needed for the new transplant” title_text=”Measuring the size of the hole” admin_label=”Image – measuring the hole size” _builder_version=”4.8.1″ _module_preset=”default”][/et_pb_image][et_pb_text _builder_version=”4.8.1″ _module_preset=”default”]
Measure the hole size needed in the new container, by placing the current container into the soil of the new pot. This is the easiest way to know exactly how big it should be.
[/et_pb_text][/et_pb_column][et_pb_column type=”1_2″ _builder_version=”4.8.1″ _module_preset=”default”][et_pb_image src=”https://www.urban-gardener.co.za/wp-content/uploads/2023/12/Placing-the-bell-pepper-into-the-hole.jpg” alt=”Gently placing the bell pepper plant into the hole in the new container” title_text=”Placing the bell pepper into the hole” admin_label=”Image – repotting the bell pepper plant” _builder_version=”4.8.1″ _module_preset=”default”][/et_pb_image][et_pb_text _builder_version=”4.8.1″ _module_preset=”default”]
Grab the bell pepper stalk and tip the container, gently shaking the plant out. Repot it with roots and soil as is, into the new hole you’ve just made.
[/et_pb_text][/et_pb_column][/et_pb_row][et_pb_row _builder_version=”4.8.1″ _module_preset=”default”][et_pb_column type=”4_4″ _builder_version=”4.8.1″ _module_preset=”default”][et_pb_text admin_label=”Outdoor Care – The Sustainable Way” _builder_version=”4.8.1″ _module_preset=”default”]
Outdoor Care – The Sustainable Way
[/et_pb_text][et_pb_text _builder_version=”4.8.1″ _module_preset=”default”]
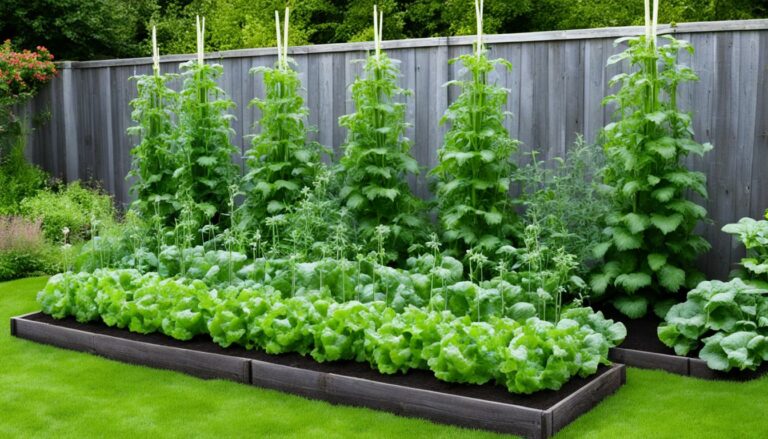
Remember, in this blog we are focusing on urban gardening, so all plants will be in containers.
If you want to take your organic gardening one step further, choose eco-friendly containers made from recycled materials, promoting “sustainable agriculture” from the roots up.
“Eco-friendly gardening” will include natural pest control methods, like companion planting or introducing beneficial insects. In other words, no harmful poisons to be sprayed on your plants!
Implementing a watering schedule that minimizes water usage yet keeps the soil consistently moist, promoting responsible water conservation practices.
And lastly, get into the habit of using organic DIY plant care techniques, such as creating your own organic fertilizers from kitchen scraps.
By infusing sustainability into every aspect of your container gardening venture, you not only contribute to the health of your plants (and therefore your health as well as you will eat what goes into the plant), but also to the overall well-being of the urban environment.
[/et_pb_text][/et_pb_column][/et_pb_row][et_pb_row _builder_version=”4.8.1″ _module_preset=”default”][et_pb_column type=”4_4″ _builder_version=”4.8.1″ _module_preset=”default”][et_pb_image src=”https://www.urban-gardener.co.za/wp-content/uploads/2023/09/Facebook-join-our-Facebok-Group.png” alt=”Banner inviting females to join our Facebook group called Moms Growing Healthy Food.” title_text=”Facebook – join our Facebok Group” url=”https://www.facebook.com/groups/momsgrowinghealthyfood” url_new_window=”on” admin_label=”Join our Facebook group” _builder_version=”4.8.1″ _module_preset=”default”][/et_pb_image][et_pb_text admin_label=”Other container gardening info you should read…” _builder_version=”4.8.1″ _module_preset=”default” min_height=”47px” custom_padding=”40px|||||”]
And if that’s not enough, have a look at these…
[/et_pb_text][/et_pb_column][/et_pb_row][et_pb_row column_structure=”1_3,1_3,1_3″ _builder_version=”4.8.1″ _module_preset=”default”][et_pb_column type=”1_3″ _builder_version=”4.8.1″ _module_preset=”default”][et_pb_image src=”https://www.urban-gardener.co.za/wp-content/uploads/2023/12/Pinterest-pin-beginners-guide-to-easily-grow-tomatoes.png” alt=”Pinterest pin – tomatoes on a tomato tree” title_text=”Pinterest pin – beginners guide to easily grow tomatoes” url=”https://www.urban-gardener.co.za/beginners-guide-grow-tomatoes-in-container.html” url_new_window=”on” admin_label=”Beginners guide to growing tomatoes” _builder_version=”4.8.1″ _module_preset=”default”][/et_pb_image][/et_pb_column][et_pb_column type=”1_3″ _builder_version=”4.8.1″ _module_preset=”default”][et_pb_image src=”https://www.urban-gardener.co.za/wp-content/uploads/2023/10/Beetroot-grow-your-own-in-a-container.png” alt=”Fresh beetroot on a table with stalks and leaves intact” title_text=”Beetroot – grow your own in a container” url=”https://www.urban-gardener.co.za/how-to-grow-beets-in-container.html” url_new_window=”on” admin_label=”How to grow beets in a container” _builder_version=”4.8.1″ _module_preset=”default”][/et_pb_image][/et_pb_column][et_pb_column type=”1_3″ _builder_version=”4.8.1″ _module_preset=”default”][et_pb_image src=”https://www.urban-gardener.co.za/wp-content/uploads/2023/05/How-to-Care-For-Your-Lemon-Tree.jpg” alt=”Pinterest pin – it has a pot with a lemon tree growing in it” title_text=”How to Care For Your Lemon Tree” url=”https://www.urban-gardener.co.za/how-to-grow-a-lemon-tree-from-seed.html” url_new_window=”on” admin_label=”How to care for your lemon tree” _builder_version=”4.8.1″ _module_preset=”default”][/et_pb_image][/et_pb_column][/et_pb_row][/et_pb_section]